<style>
.main{
}
.main img{
border-radius:10px;
}
.main h1{
text-align: center;
border: none;
color:4B4B4B;
letter-spacing: 3px;
}
.main h6{
text-align:right;
color:#F4AA14;
font-size:18px;
}
.main code{
background-color:#FFF0D1;
padding: 8px 10px;
border-radius: 20px;
margin-right:7px;
}
.main h2{
background-color:#0B8D97;
color:#fff;
width: max-content;
padding: 7px 25px 7px 17px;
border-top-right-radius: 40px;
border-bottom-right-radius: 40px;
border-bottom: none;
margin-top:46px;
margin-bottom: 25px;
}
.main h2 img{
padding-bottom: 4px;
border-radius:0;
}
.main p,li{
font-size: 18px;
line-height: 29px;
letter-spacing: 0.15em;
color:#525252;
}
.main .result{
background-color:#0B8D97;
padding:0.8rem 1rem 1rem 1rem;
border-radius: 10px;
}
.main .result h3{
text-align:center;
color:#fff;
margin-bottom:3rem;
}
.main .result h3 img{
margin-bottom:0.5rem
}
.main .result .pic img{
border: 5px solid #FFFFFF;
}
.main .pic{
text-align:center;
width: 84%;
margin: auto;
margin-top: 2rem;
}
.pic p{
color:#fff;
text-align:left;
font-size:1.8rem;
line-height:4rem
}
</style>
<div class="main">
# Webduino 聯網智慧插座實作,以 Node-RED、Google 服務開發,用網頁、手機控制各種家電
###### `進階` 6 小時
##  課程目的
智慧家電到底多貼近生活呢?不妨來親身體驗!本次課程藉由深入淺出的8大範例應用,帶你掌握最完整的物聯網開發過程,運用Node-RED及Google服務串接網頁前後端真正落實雲端監控、智慧生活,最終透過網頁、手機與各種感測器來控制家電,實現各種居家改造的創意,並贈送「實戰家電物聯網」一書。
##  課程目標
1. 學習Webduino 雲端平台和基本操控原理。
1. 學會串接 Google 試算表與 Google Maps,以獲取資料。
1. Node-RED 後端應用 ( 爬蟲、接 OpenData、推播 email )。
1. 掌握 Webduino 開源技術,並串聯至生活的一部份,透過雲端操控、網頁互動、結合後端以落實家電改造。
1. 從無到的有打造智慧插座。
1. 全套軟硬整合應用教學,培養跨領域的思維與開發等能力。
1. 認識講師,遇到困難有人回答。書本資料太多、網路資料太分散,現場有人教學得快。
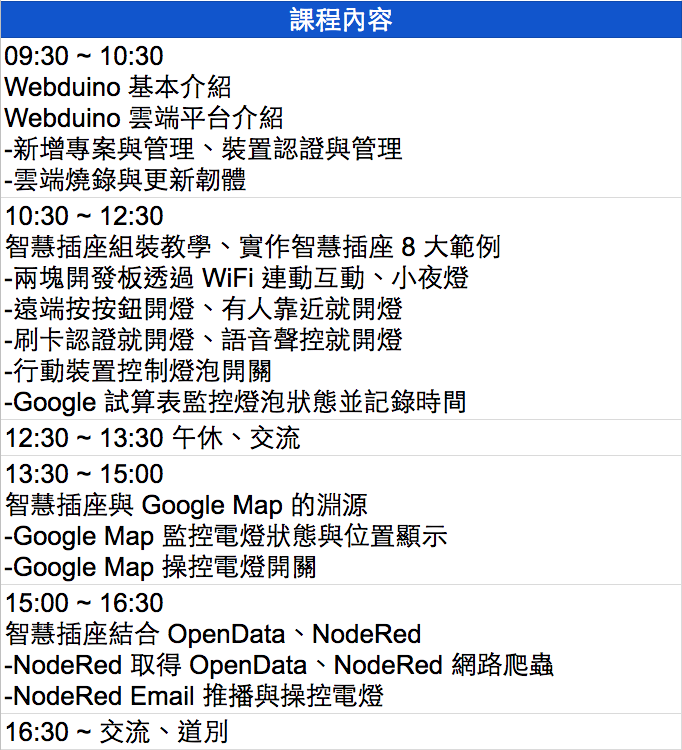
##  課程內容
##  課前準備
1. Webduino Smart x1+Micro USB傳輸線 x1(可自備)
1. 智慧插座套件 x1
1. USB LED燈 x1
1. 轉接頭 x1
1. 電子零件包 x1
<div class="result">
###  成果展示
<div class="pic">
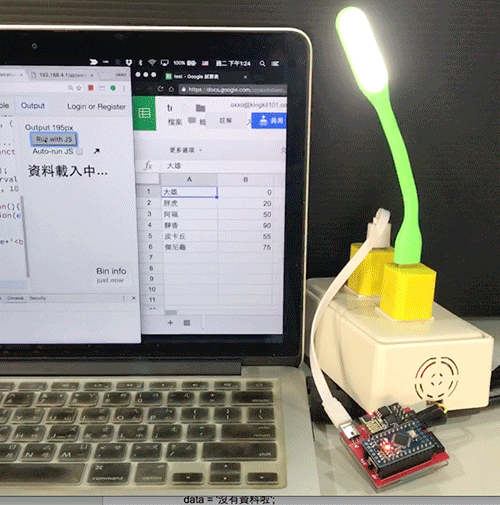
▲ 智慧插座結合 Google Spreadsheet
</div>
<div class="pic">
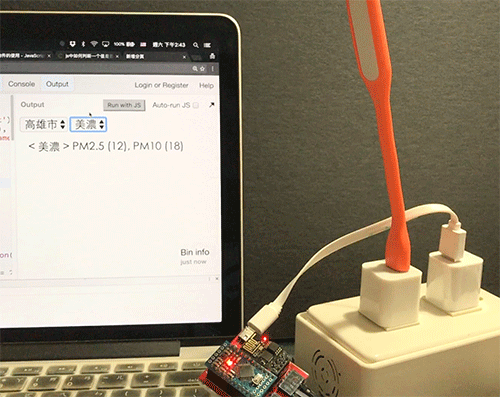
▲ 智慧插座警示燈:結合 Opendata 顯示空氣品質超標
</div>
<div class="pic">
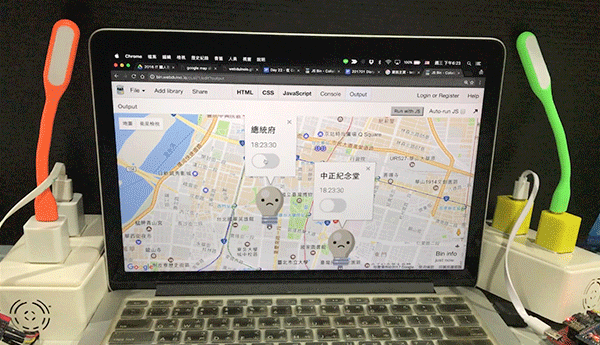
▲ 智慧插座結合 Google Maps
</div>
</div>